photo Image277_1x1_zps92a4c832.gif photo Image277_1x2_zps82501ae2.gif photo Image277_1x3_zpse2f7619b.gif photo Image277_1x4_zpsbfd3d820.gif photo Image277_1x5_zps55244bd5.gif photo Image277_1x6_zpsa94012cf.gif
Showing posts with label resource. Show all posts

Friday, August 10, 2012

I Just Got a Teaching Job... Now What?!- Setting Up Your Room

You all are so great for listening on my last post. I think (hope) we all have those moments of feeling totally overwhelmed at the beginning of the school year, especially when moving rooms or switching grade levels or just starting out- and your comments made me feel better, like I wasn't just being a crazy person! Things are getting better, though, and I'm starting to feel excited about 3rd grade again!

I kind of got out of my new teacher series, but I'm hoping there are still a few new teachers that haven't started yet and this might be helpful to. If not, well... there's always next year!

Okay, okay, you finally get to think about setting up your classroom. Even before you go in, you can start thinking about what spaces are on your 'need' list, and what spaces you 'want' to have if it works out.

Step 1- Make a List of Spaces You Want and Need

As you think about spaces in your room, you need to think about the spaces for LEARNING, the spaces for TEACHING, and the spaces for STUFF! You might not need all of these, but here are some suggestions to get you started.

When I say teaching, I'm talking about teacher-directed activities. Of course, students should learn there, too, but the "learning" spaces are for student-directed activities.

TEACHING spaces-
Whole group (carpet)
Small group (usually a horseshoe, semicircular table)
Individual (could be shared with one of the other spaces)
Calendar (could be shared)

LEARNING spaces-
Center spaces?
- Buddy Reading
- Listening
- Writing
Library
Cool Down/ Safe Spot/ Time Out spot
Student Computers
SmartBoard (could be shared)

STUFF spaces-
Coats & backpacks
Shared student supplies
Individual student supplies
Passed back work
Turned in work
Math manipulatives
Science supplies
Snack supplies
Files/ Binders/ Teaching materials
Teacher desk (if you are having one)
Small group materials
Book boxes
Necessary wall displays
Storage of notebooks, writing binders, etc.

WALL spaces-
Calendar
Star Student/ Student of the Week
CAFE or Reading focus wall
Posting of objectives or homework
Word Wall
Hundreds chart
Places to post student work or anchor charts
Boggle board

The important thing is to start big, and then think detailed.

Step 2- Check the Limits of Your Room

Once you have a list of the spaces you want and need, it's time to talk to your technology person, if you haven't already. What are the connections that you can't move? For me, my teacher computer had to be in a certain spot so it could connect to the SmartBoard (which had to stay in its certain spot). Not where I wanted my desk, but I like having my computer at my desk, so... I guess that's settled.

Then, look at what else can't be moved in the room. If you have bookshelves built in, or a sink area, or coat cabinets, those are going to help determine some spaces right off the bat.

When you're thinking about wall spaces, consider which spots are magnetic.

This is also a great time to ask your custodian if there is any extra furniture you might be able to snag, so you can take that into account for your planning.

Step 3- Sketch Your Room's Teaching and Learning Spaces 

Go ahead and sketch out the basic shape of your room with those Can't Move items included.

Then, get out some sticky notes and write out the Teaching and Learning Spaces you brainstormed up above. You can cut Post-Its or put two together if you need to drastically adjust their size. From there? Start playing around with the Post-Its.

It's much better on your body to move Post-Its 50 times than to move furniture 50 times.

I know that I still have to "see" it- but Post-Its help me find a good possibility so I don't have to move it all too many times.

I forgot to take a picture of mine, but here's one from Ms. M. Click her photo to go to her classroom design post:


There are computerized ways to make a mock classroom layout, but I like Post-Its. More fun, and no need to worry about wanting something at an angle that a computer won't allow.

It's important to think over student teaching as you sketch.
  • What worked for ME in that classroom?
  • What didn't work that I need to do differently?
  • What were struggles I had that I need to plan to avoid?
  • What are some areas where I still need help and can ask someone for a suggestion?
Keep in mind that what worked for your mentor teacher may not have been what worked for you- and that's okay! I'm a piler by nature- so I knew that I would need to work to make a system for where every little thing went. (I'm still working on this.)

This is a good time to think about your desk arrangement, too. Do you have desks or tables, and how do you want them seated? I like to change my set-up throughout the year, but generally, I like groups and my students do, too.

Step 4- Try Out the Arrangement

Yup, move the actual furniture around. Invite friends and family for this step. Order pizza if needed for bribery. For super-big stuff, like a teacher desk, the custodian sometimes has tools that will help. Please be careful not to scratch the floors or mess up the waxing, because you want the custodial staff happy.

Once you have the room tentatively set up, walk around it. Sit down in the student spaces, and see what it's like from a shorter perspective. Sit down in your teacher areas. Make sure that you can see the whole room from your small group area, so you'll be able to supervise all of your students. Make sure you have the wall spaces where you need them. Walk into the room from the hallway and see what you notice.

Make adjustments as needed, but hopefully, you've got a basic classroom layout!

Step 5- Add in the Stuff Spaces

As a person who struggles constantly with organization (yet lives with a darn-near OCD husband- not sure how he puts up with me!), I know that you have to have a specific place for every thing, and a specific procedure or schedule for how they get put away again. Right now, think about the spaces for students. (We'll deal with organizing your teacher area next time.)

As you think about the 'stuff' spaces, it's important to think about your procedures. What are the things you want your students to do in the morning, and at the end of the day? Is there a "flow"?

I'm trying out an acronym this year to see if it helps my students remember what they need to do, but I also post this as an anchor chart near the door. Click the picture to snag a free copy of my morning procedures anchor chart.


If you're looking for more classroom setup tips, I cannot recommend the book Spaces and Places highly enough. The Cornerstone also has some great classroom setup information, both on her website and in the book!

Plus, if you haven't already, you have to check out The School Supply Addict's room setup page for inspiration.

And just remember, if you happen to get stressed...


Have fun setting up your new classroom!

Saturday, June 16, 2012

Classroom Library Company- my review, part 1

Well, I definitely feel like I've made it to the big time.

I posted a couple of weeks ago about organizing my classroom library, and within a day or two, I was contacted by the Classroom Library Company. (No, I don't have some big *secret*- not sure how he found my little corner of Internet!)

At first, I thought it was just spam. But, as I pointed out to my husband, it takes a pretty dedicated spammer if they take the time to create a company website and get 900 connections on LinkedIn.

Yup, that's my response to an offer for free stuff- get paranoid and become a stalker.

But don't worry- Classroom Library Company checked out!


When I opened the box... here's what I saw! (It was packed neater before I tore into it!)


First of all, you know how excited I was to get my book boxes a few months ago. But as cute as they look, I'm really worried that they're not going to hold up.
 
 
Thin cardboard has lasted well for two and a half months, and if I'm lucky, they'll make it through this coming year, but at some point, I'd love to invest in some nice, sturdy plastic book boxes for my students.


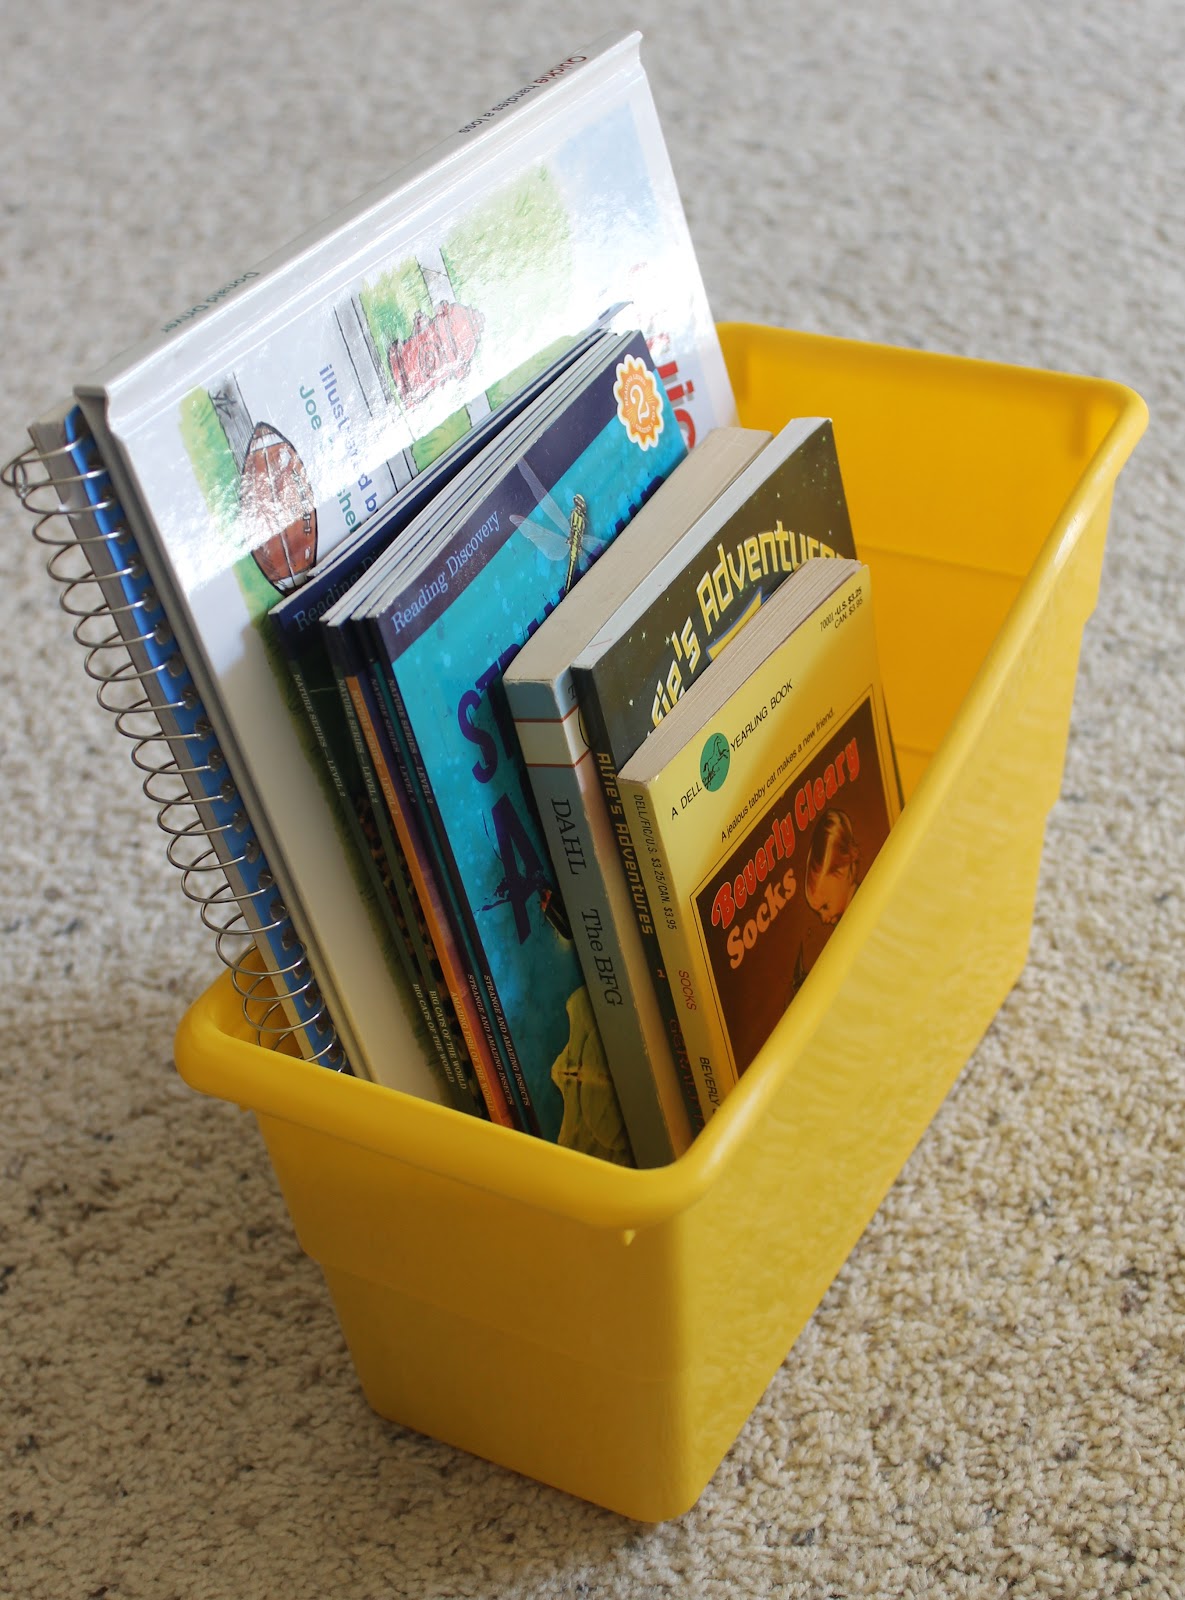
These would totally fit the bill.


Look at how much they can hold! I did open them at home, so my children's book supply here was limited. Still, this even fit my biggest book (a children's book by Donald Driver, my faaavorite Packers player!), so this would fit picture books as well as chapter books or leveled readers! It even easily fits a large notebook, so I know my students' reading workshop notebook would fit perfectly to keep all of their reading tools together.


And look at the design. Clean, simple, attractive, and yet- sturdy, thick plastic that kids won't ever be able to destroy will take a very long time to destroy. (Kids have amazing destructive powers. I'm not sure I trust ANYTHING to stand up to them forever!)


I'm excited to use this to hold my copies of guided reading books by my reading table! (At least until I save up a bit for a whole class set of book boxes!)

And I can group those books together using the book band they sent me.


The lens cap is there for a sense of scale. This thing is THICK.


So thick that it can tightly stretch over books without causing any damage to their edges. This will be perfect for keeping sets of books together so I don't lose them.


And in case you're looking for a basket, instead of a vertical book box, check out these.
 

 They are such a great book size- wonderful for setting up your library!- and look at these sturdy handles.


Holds plenty of books- even the big ones!

And that's not all- they also sent everything in this thick, double-layered cardboard box.


And check out the label:


This company has book collections, and-

wait for it-

they all come already sorted, labeled by level, and shipped in these boxes. So if you don't have the budget yet for their adorable baskets (or the other kinds of library storage you can find on their website), you will have nice cardboard boxes that match and are ready to slide onto your bookshelves.


 Oh, you don't have bookshelves? You can buy shelving meant to PERFECTLY fit these boxes.


After spending hours reorganizing my library, how could I not appreciate a company that makes a ready-to-use classroom library? *swoon*

Can you imagine the possibilities for a grade level or whole school to get a custom library that's easy to set up and share? They have a form just for "designing your own library," based on your needs... I can see the grant application already!

And for those books that you already have in your library, before you found the Classroom Library Company? They've got you covered. You can easily (and cheaply) print custom labels for the books you already have, using their Book Retriever website and app!


And, that app? I am so excited to have an iPhone or iPad and get to try it out, because it's good for more than just labels.


Look at these screenshots- doesn't it look easy to use? You can check books in and out, check on what individual students are reading, look for books that are the correct level for your group, and even see which books are most popular in your library right now.


How great would this be to let students check books out in your classroom library? I'd feel so much more comfortable letting kids borrow my books and take them home if I had this kind of easy record. Maybe I can even let my classroom librarian (after a little training) check books in and out for me with the iPad.

It's just 99 cents, and for me, anything that helps with classroom library organization... SO worth it!

Okay- as amazing as this stuff is, I still have more things to share about this company. I spent a ridiculous amount of time flipping through their catalog having Total Library Envy, and after a special Father's Day post tomorrow, I'll share some of my favorite catalog offerings (and a few more little things they sent me!)


If you just can't wait for the rest of my review, check out the Classroom Library Company website. They're a new company, so the website specifics aren't all quite there yet- but check out the interactive catalog and I am sure you will be as impressed as I am!


*For the record, Classroom Library Company did send me free products, but didn't require that I review them (although Ben did say he'd appreciate it!) I am posting this review (and the next one) because I really think the products and services are quality, and worth sharing to other teachers!

Monday, February 25, 2008

Resource: YouTube (They Might Be Giants, "Bloodmobile")

Some schools see YouTube and other similar sites as an enemy, but if you have a way to project the monitor display of a computer in your classroom, YouTube can be a great source of educational material! The small icon in the lower right corner of each YouTube video's page will let you expand it so that it covers the whole screen.

For example, lots of educational songs with music videos (such as those by School House Rock or They Might Be Giants) can be found on YouTube. Some are official and copyrighted, but YouTube is still a good place to discover these resources so that you can buy them legally. Others are put together by fans, or have been released by the artists, and are fair game! All videos need to be previewed, of course, but there is just so much out there.


This is one example of a video which could be used to introduce or even help teach a unit on the circulatory system or blood. To get to the video's own webpage, click on the video.

There are a lot of pointless videos on YouTube, but there are also a lot of things that can be very helpful to teachers. I'll be posting useful videos as I find them, and I encourage you to use them in your classroom as a more entertaining way to teach or introduce a topic!