photo Image277_1x1_zps92a4c832.gif photo Image277_1x2_zps82501ae2.gif photo Image277_1x3_zpse2f7619b.gif photo Image277_1x4_zpsbfd3d820.gif photo Image277_1x5_zps55244bd5.gif photo Image277_1x6_zpsa94012cf.gif
Showing posts with label classroom setup. Show all posts

Thursday, April 21, 2016

Cute and Content: Not So Impossible!

The first school where I taught was considered “failing.” If our test scores didn’t go up that very year, the school would be taken over by the state and we had a good chance of losing our jobs.

No pressure or anything, right?  : )

A big push from our administration was to consider the value of each and every activity we were doing. Was it cute, or was it content?

While I only taught there two years, the mantra stuck with me.

Now, I don’t mean that we can never do the cute stuff, or that my room is bare. I spend so much time there, and so do my students! But I’m a big fan of bringing in a little content with the cute whenever possible, especially now that I teach 4th grade.

IMG_7808     IMG_7787

This year I decorated with lots of classroom décor items from Creative Teaching Press. I have absolutely loved the layered look of the borders and the colors really brightened up my all-white room! (Check out my turquoise classroom décor here.)

So, Creative Teaching Press definitely brought the cute- but you may not know that they also bring the content, even for the upper grades.
                                
Close reading is one of the most vital ways we dig into text, and I love this close reading poster set for reminding students of the routines! It has a fresh, modern feel- but more importantly, it gives kids a practical reference to use during class. The specific examples for text-dependent questions would be SO helpful for my struggling students!


And for math, I love introducing my students to multiple strategies for solving. For my kids, it’s never been helpful to just put reference material on the wall without really using it together- so I love to laminate posters ! That way, I can write on them with a dry-erase marker during our mini-lesson.

Once we’ve introduced and practiced each strategy, we add it to the wall- and the kids can use these anytime they need a reference! Anchor charts, like these for Multiplication and Division Strategies and for Algebraic Thinking, can really  help our students be successful- especially if we make them an interactive part of our lessons.


And, while they’re a very visual way to help kids remember and use the content we learn, they also happen to fit in seamlessly with the classroom décor I already have. (See how well the posters all pair with the lime green mini hexagon border and ombre turquoise scallops border? LOVE!)

Just remember- no matter what your classroom theme or color scheme is, it’s ultimately a classroom. When your mind starts to drift to next year’s classroom theme or setup (I always start thinking about that this time of year!) don’t forget to think about the content as well as the cute!

And to help you out? Creative Teaching Press has offered to share all of the items in this post with one of YOU! If you’re looking for colorful, cute, and practical classroom décor- make sure you check them out.


CTP is always adding new products, too- like a new Snow Much Fun! Bulletin Board to celebrate winter this year featuring a snowglobe, banners, mittens, and more.


To see more of what Creative Teaching Press has up their sleeves (and to enter for more free décor!) hop over to Ehle Kindergarten!
Mrs. Ehle's Kindergarten Connections

post signature

Friday, August 28, 2015

Turquoise, Lime, and Chalkboard Classroom Decor

Sometimes when I see classroom décor on Pinterest, I get a little overwhelmed. I LOVE bright colors so much, but sometimes a mix of a lot of colors and patterns can feel a little too ‘busy’ to me.

For my upper elementary kids (4th grade), I really wanted to make my room cute but still simple and clean… but sometimes that’s harder than it seems!

When I first saw the Creative Teaching Press Chalk It Up! line at the EdMarket EdExpo last year, I swooned a little. THIS. This was what I was looking for- sophisticated and cute, but not overwhelming and distracting!

Here are my 8 tips for keeping classroom décor simple:

1- Use one color for all bulletin boards to give the room a cohesive look.

IMG_7792

I try to use similar borders, too, so everything looks like it matches. You won’t believe what a difference it makes when they all look similar! My mom has fabric sheets instead of bulletin board paper so she can use them year after year.

2- If you want to try layering borders, stick to simple shapes and patterns.

IMG_7808     IMG_7770

This was the first time I’d ever layered borders, and after hearing how complicated it was, I have to say I was pleasantly surprised. Using a rectangular border on the bottom made it EASY for the borders to look really good.

The Dotted Swirl border is my favorite. The long, sweeping pattern makes my boards look longer than they are. I put the Lime Hexagons border behind it- a “solid” color from far away, but with a little detail and texture up close! Putting a bold pattern with a solid (or at least something close to a solid) really holds back the sensory overload.

3- Don’t be afraid to try something new.

As I started putting the borders up, I did the top and bottom and realized I kind of liked the look without borders on the sides… so with some confirmation from my friends on Instagram that I wasn’t crazy, I went with it!

4- Use what you have!

Why did I choose lime? Well, I like it- but more importantly, the lime color tied in well with the palm umbrella I’ve had for a few years (yay for “end-of-season” Big Lots finds!) and the dollar store baskets I picked up for my very first classroom. New teachers, pick a color or two that you love, and stick to them when you can!

IMG_7793

It was funny to me that a couple of teachers at my school assumed I’d spent a lot of money redoing my room, but I had long been collecting containers in my favorite colors (turquoise and green), so when I used those colors and added just a few new details, it really didn’t cost much to give my room a fresh new look!

5- Don’t forget the text.

Little things go a long way in giving your room a little pizazz! For me, the Chalk It Up! letters were easier than making my own letters in the workroom, and added that extra element of cohesion when I used them around the room.
IMG_7759

To make them stand out, I used green duct tape or green paper plates. LOVE how this Scientist board turned out! (I can’t wait to show you what else I’m going to add!)

IMG_7768

6- Shop for deals- but be careful!

In the past, I’ve used a lot of borders I’d found for $1 at a dollar store or spot- thinking I was saving money. I finished my ENTIRE ROOM- well, minus the one tiny spot- with one pack of Dotted Swirl, one pack of Lime Hexagon, and one pack of the lightbulb pattern (with a lot to spare in this one!) Plus, the borders were a lot longer, so it didn’t take me as long to put them up. Pretty sure the “cheap” borders ended up costing me more in time and money, by the time I got enough for what I needed. Lesson learned.

Now, I did splurge on a few things- but I try to make those splurges something I will use for years to come, like my new sign from Tallahassee Sunday. (He’s so HAPPY!)

IMG_7773

7- Don’t be afraid of white space.

Sometimes I look at a teacher’s wall and it’s as though they want everything a student will ever know to be plastered on the walls. I know that we need to have reference material for our students, but sometimes students don’t use the things we put up before they arrive- especially when it’s one little section of a COVERED wall.

There’s nothing wrong with a little blank space. Just ask Taylor Swift- and any kid in your class with ADHD.

IMG_7744

It’s also okay if your room is not done on the first day, too. This is what my biggest board looked like when students arrived. Yes- with a stack of books, and a small piece of border missing because I ran out! Just a background and borders go a long way.

8- Function over fashion. Always.

As I said in my post about classroom design for new teachers, “You were hired as a teacher, NOT a classroom cutesifier.” Your class should be designed around the instructional spaces you need. I am big on using anchor charts, so one of my walls is almost completely blank- ready for me to hang the anchor charts we make together.

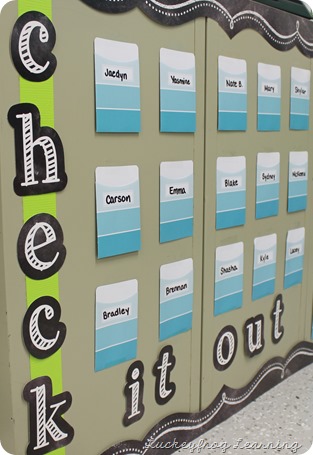
I teach 5 classes of science and 1 class of social studies and keeping track of make-up work for so many classes was a struggle- so this make-up work system is a necessity!

IMG_7746

We are required to post our I Can statements, so these posters have already been worth it. (I laminated them and use a chalkboard marker to write on them. Easy peasy!)

IMG_7787

Ultimately… what is most important is our teaching. But there’s also power in giving our students a space they are excited to walk into, and enjoy spending time in. Our students should feel comfortable and happy in our space- and so should we- because we spend so much of our time in our classrooms, and we learn and teach better when we feel content!

IMG_7744-001

When you start thinking about a classroom makeover, please consider Creative Teaching Press. I did get a chance to work with them this fall, so I’m definitely a little biased, but I think the photos of my room speak for themselves. This company makes some beautiful, practical teacher décor- and it really is perfect for that simple, upper elementary look!

You can check out more cute classroom décor from Brenda at Primary Inspired!

Primary Inspired

Sunday, July 26, 2015

Classroom Supply Organization for Departmentalized Teachers

Back-to-school time is always a little crazy, but a few of my upper elementary blogging friends have teamed up to share some of our back-to-school tips and tricks!

Last year, I moved into a departmentalized 4th grade classroom for the first time. I love getting a chance to really focus on teaching science, but seeing 125 students instead of 25 really changed the way I set up my classroom! Today I’m sharing supply organization tips specifically for departmentalized teachers (although many of them would work in any classroom!)

Slide1

I set up these Sterilite drawers at the end of each table, and they are a lifesaver! Everything my students need on a regular basis is in these drawers. Because they switch classes, it’s really helpful to have the glue, scissors, markers, and crayons here (rather than having them carry their own). The bottom drawer holds our science textbooks (the drawers struggle a little with that much weight, but we don’t actually get them out much), and the top drawer holds small whiteboards, dry erase markers, extra pencils and erasers, and sets of markers.

IMG_5571   IMG_5594

Having the markers in individual “sets” made it so much easier to find text evidence in the passages from my Text Detectives (for 3rd grade and now 2nd) and Colorful Close Reads. This year, I’m keeping an eye out for travel soap containers so I can store my crayons in  similar way. I love Crayola, but those boxes just do NOT hold up!

IMG_7373

Last year I used shower caddies instead of these smaller craft caddies. They held a little more, but they hung over the sides of the white drawers and sometimes my students would bump them… and of course, everything would fall all over the floor.

IMG_5499   IMG_5555

My solution this year was smaller caddies and Velcro on the bottom. (I start with both Velcro dots on to make sure they will line up.) I’ll keep you posted how it works!

Slide2

My kids have science notebooks that stay in our classroom, and sometimes last year one was left behind. Despite sticker labels, it sometimes took a little time to figure out where it belonged- so this year, I’ll be using duct tape on the spines to help easily see where it goes.

I can use the same color-code for almost everything in my classroom, too!

Slide3

I store my notebooks in these Dollar Tree bins. The same color of duct tape helps students identify the correct bin quickly, and once the school year gets started, I’ll write the homeroom on the frog, too. All of the bins sit on the floor under the whiteboard, in the order of when I see each class.

Since my students come in and start their day with a Science QuickWrite, I have a couple of students pass out the notebooks at the start of class. As I dismiss groups at the end of class, each group can drop their notebooks in the bin on their way out.

Slide4

With 5 classes of science and 1 class of social studies, I occasionally struggled to keep up with make-up work. While my students were supposed to come pick up their work independently, it rarely happened- and then I spent time later trying to figure out what was missing.

Putting these open folders up on the cabinet in the back of the room helped me so much! As my students get started on their QuickWrite, I take a moment to catch up with any students who have papers here- whether they are absent work, papers to re-do, or pages I kept aside for reteaching.

Slide5

Being a science teacher, I could spend so much time handing out materials. As much as possible, I try to keep common supplies at the supply stations and any special supplies (such as those for a lab) in a bin at the front of the room. I can simply call up one student from each group and most materials are ready within a minute!

This also helps because I see my classes every other day. (Our kids go to reading and math every day, but during their third block, they alternate between science and social studies.) This means that I teach the same lesson for two days in a row- so being able to keep all materials in a bin makes for easy clean-up at the end of the day, too!

Slide6

While the “stuff” can be overwhelming when you see six classes, the paperwork can be even worse! The students each have a binder with tabs for each class, and my teacher binder has tabs for each of my classes, too.

Once the papers are turned in, I group them together with Clip-Rite BinderTabs (shown above). I use a small class checklist to mark off whose I have, whose I’m missing, and what the scores are. (Makes it so much faster to put grades in the computer!)

IMG_5667   teacherbinder2

As soon as I have copies made, I keep my papers that I’ll need for teaching in the purple, blue, and green plastic drawers. (I love that they’re the 12x12 size so I can put one stack horizontally and then the next vertically!) I use the top black tray for the kids to turn in regular work, and the bottom tray for the kids to turn in anything late (make-up work, late work, redone work, etc.). I love having a central spot for any other supplies a kid might need (stapler, tape, hole punch, etc.) so they don’t have to ask me!

There is so much to do this time of year- but hopefully these tips give you some classroom organization ideas! For more tips on starting the year off right, I hope you’ll check out the rest of the Back to School Survival Guide.

back to school survival guide

And to thank you for checking out our blog hop, we’re EACH giving away 2 gift cards to TeachersPayTeachers. If you could use $25 to spend on back to school goodies on TpT, be sure to enter the giveaway below.

a Rafflecopter giveaway


If you’d like a few more Back to School ideas (and more chances to win $25 gift cards!), please be sure to check out some of the other blog posts. Good luck as you start another school year!


post signature

Friday, May 29, 2015

Creative Teaching Press Classroom Decor Giveaway!

This time of year, I always start to think about next year. Am I crazy?!

On our teacher work day today, I’ll be taking down things from this year and thinking about my classroom setup and classroom décor for next year… which is perfect, because I get to work with Creative Teaching Press this year!

Creative Teaching Press was founded by a teacher fifty years ago, and her creative ideas grew into a family-owned, teacher-managed business that aims to give teachers the supplementary materials they need to help students learn and feel comfortable at school… and as part of their 50th anniversary celebration, Creative Teaching Press is letting 33 bloggers EACH give away $50 in free classroom supplies!


Did I mention they really listen to teachers and make adorable things?

I’m not gonna lie- my classroom this year was pretty bland. As I’ve written, I had that new teacher feeling something fierce- and classroom décor fell by the wayside.

One of my goals for next year is to make my room more welcoming, calming, and organized- because I want my students to walk in the room relaxed and ready to learn. Since I teach fourth grade, I need something calming that still feels mature and not a bit “baby-ish” to my big kids.

The new  Chalk It Up! collection will be the perfect contrast to my stark white walls, and I’ll add in some of the blue, green, and turquoise I love using the Painted Palette collection.

I love how cohesive each collection is- makes it easy for teachers because the colors all match!
I plan on using similar bulletin board borders around my classroom for consistency. I love the idea of layering the borders together for a new look!  Check out a Solid Turquoise Wavy Border plus Chevron in Chalk border- I can absolutely see this on a bulletin board!


You can stick to one color and combine the collections, like this look with Chalk It Up! Dots on Chalkboard! Lime Border paired with a HexaFun Lime Green Mini Hexagons Border.


I think this is my favorite- an Ombré Turquoise Scallops Border from the Painted Palette collection with the Chalk It Up! Dotted Swirl Border. I love this pattern and how it looks hand drawn!


With 5 classes going in and out of my room and all the supplies that come with a science classroom, it’s so important to label things- so these Painted Palette Ombre Scalloped Labels in blue and in turquoise are going to be perfect, especially with the Chalk It Up! Chalkboard Labels.


See? So many cute classroom ideas!

I am also super excited to transform my functional-but-boring make-up work system to something a little more wow using these jumbo library pockets! They will fit a full size sheet of paper, which makes it so easy for me to keep track of it all!


You can enter below:
a Rafflecopter giveaway


If you’re feeling lucky, each CTP teacher blogger is posting about her favorite new products (and giving you more chances to win!) Next, Kayla at Top Dog Teaching shares how she combined the Creative Teaching Press Chalk It Up! collection with rainbow colors from the Painted Palette collection.

(She’s also doing a TED Talk about teaching soon, so she’s pretty awesome!)

Check out Top Dog Teaching here:


post signature